Zephyr for Jira and Cucumber for Jira should be installed on your Jira Cloud instance
This tutorial explains how to leverage BDD in Jira Cloud with Cucumber for Jira and Zephyr for Jira.
Create a new Jira project and activate BDD on it
Project creation
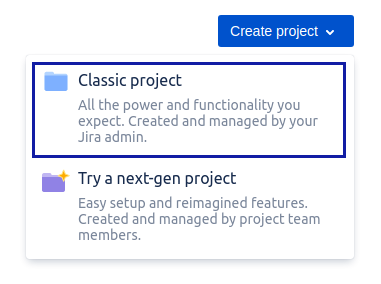
On the projects page, create a new Classic Jira project.
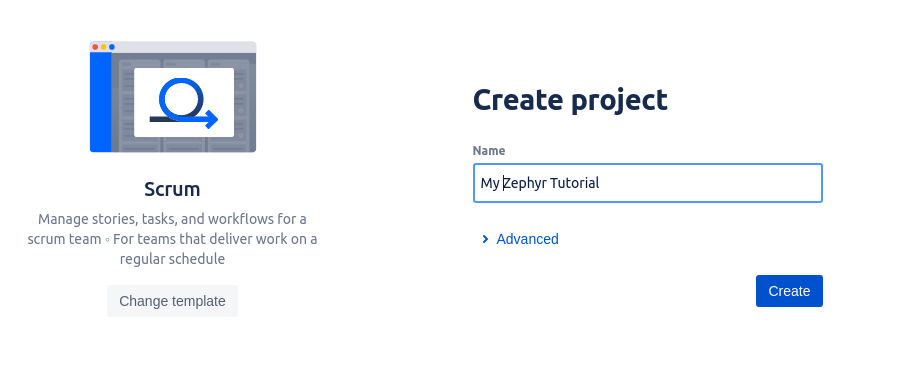
Select the Scrum template for example, enter the name of this project and click on Create.
Project configuration
To use Zephyr for Jira and Cucumber for Jira you need to add the Test type to your project and activate BDD feature on the project.
Add the Test type to your project
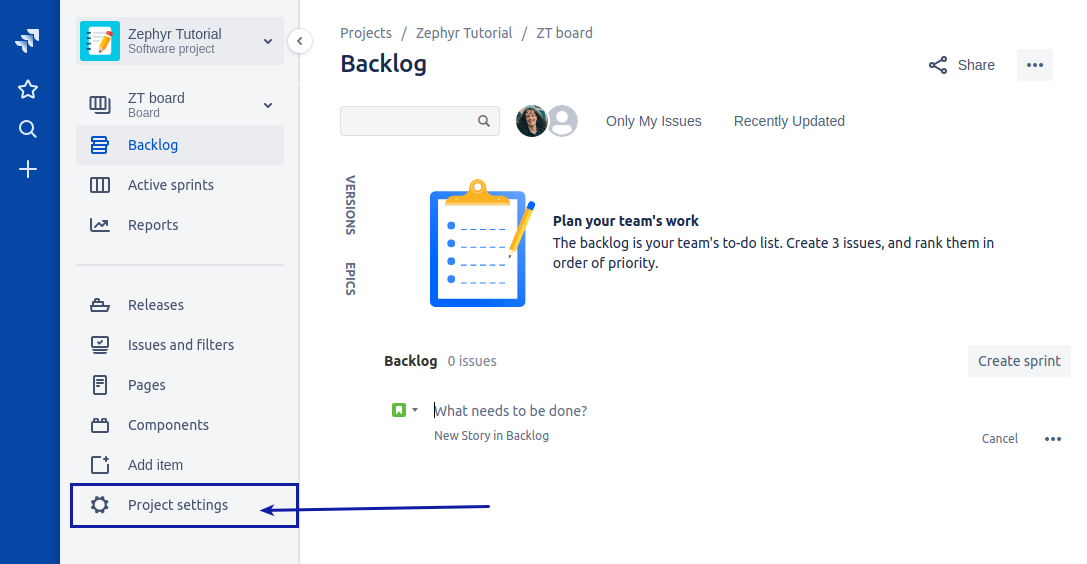
To be able to use Zephyr, you need to add the Test type to this project. To do that, go to Project settings:
Select the Issue types menu:
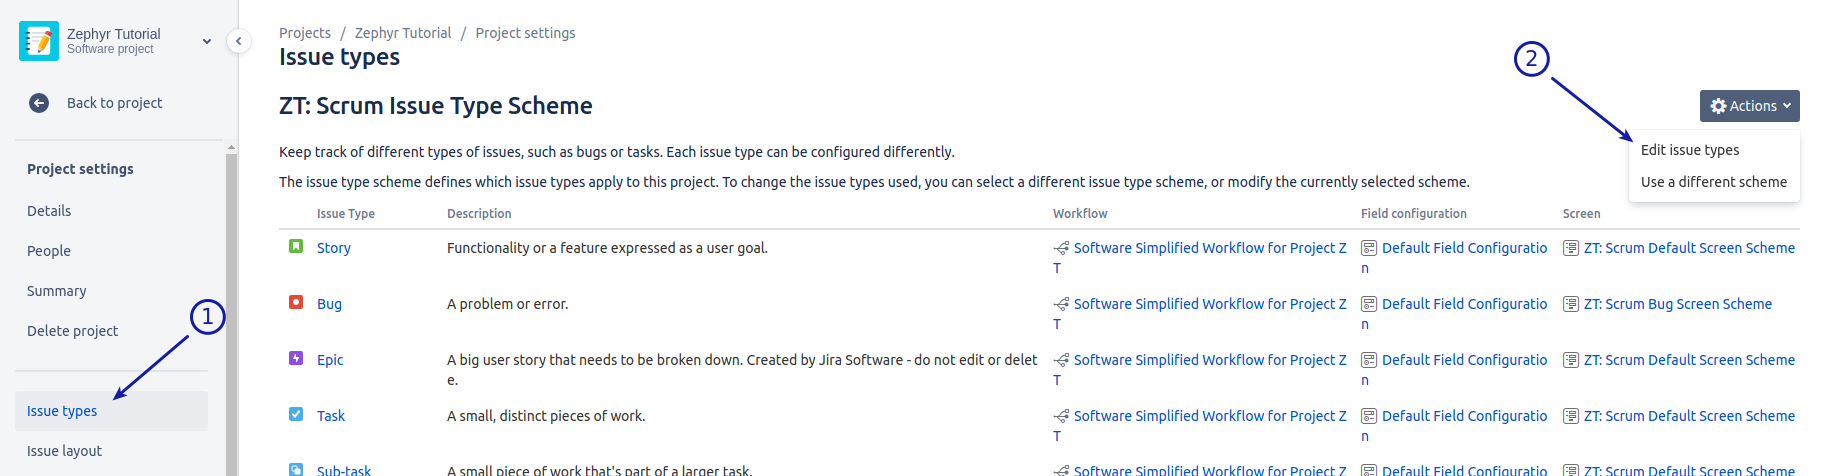
Drag and drop the Test issue type to Issue Types for Current Scheme:

Don’t forget to save. That’s it!
Activate BDD feature on the project
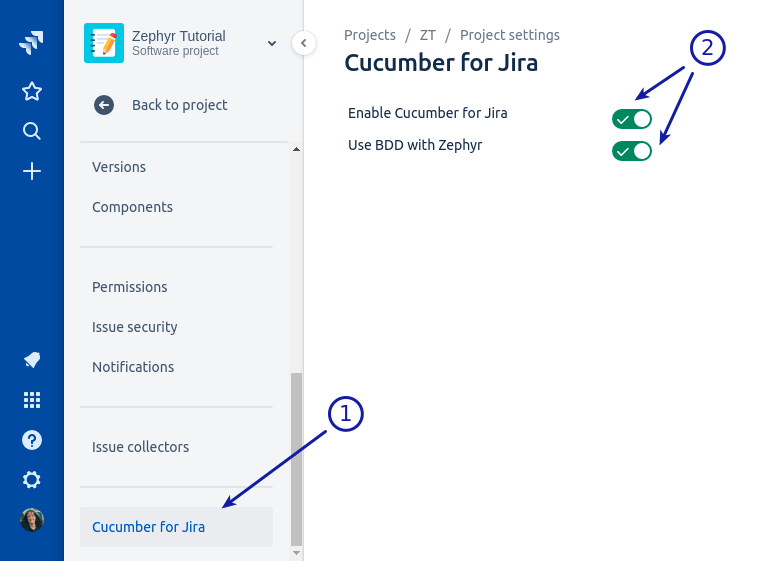
In Project Settings, select Cucumber for Jira to display the Cucumber for Jira settings, and active the both options. The first option allows to enable the Cucumber for Jira features and the second option allows to activate Zephyr dedicated BDD feature.
That’s it! Your project is BDD ready. In the next section, we will add first features in your project.
Features design
In this section, we will see how to design your features and your scenarios.
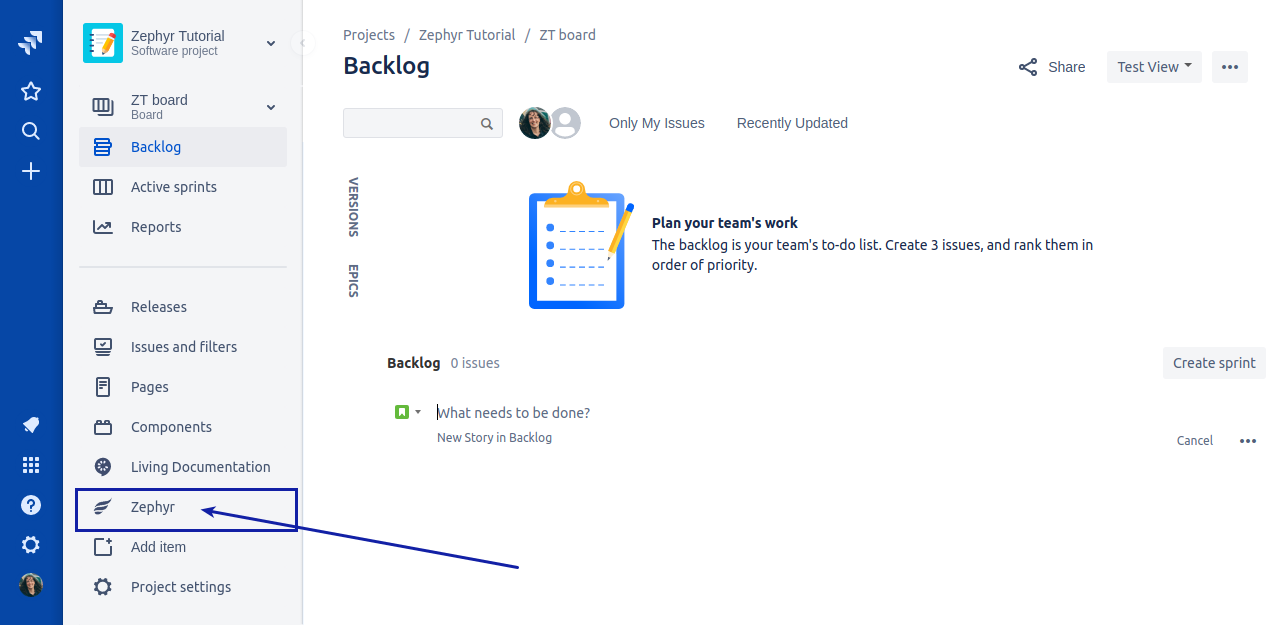
Back to project, and select Zephyr in the menu.
Feature issue creation
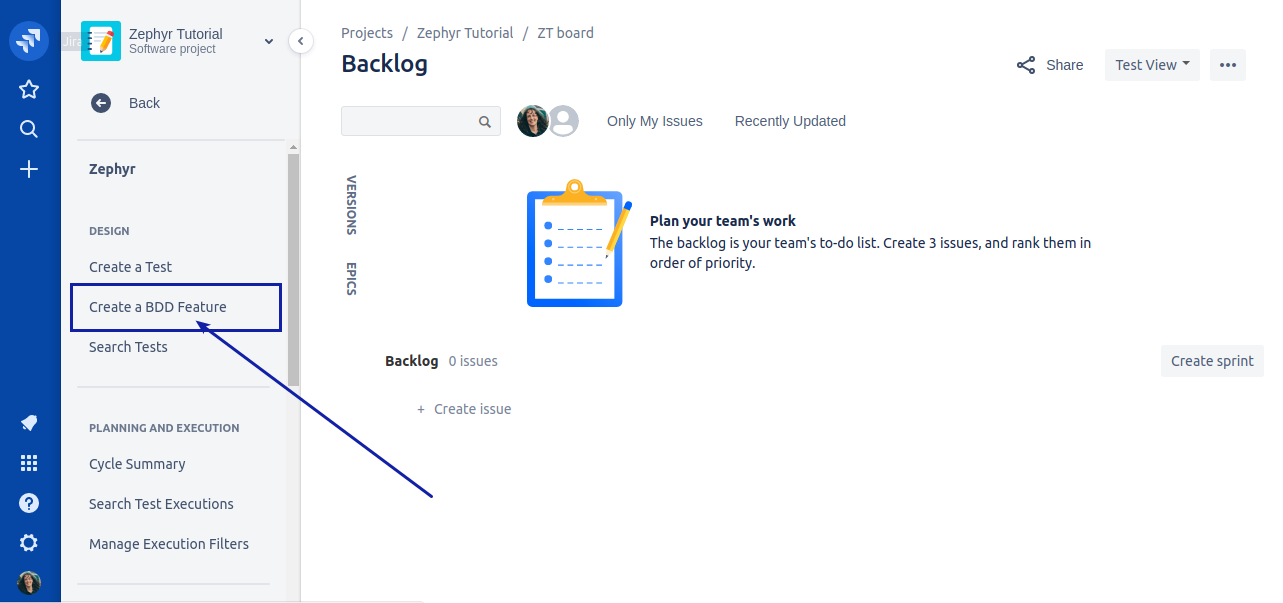
In the Zephyr menu, select Create a BDD Feature:
The Create issue box appears. By default, a Feature issue is a story with the BDD_Feature label feature. Put the name of the feature in the Summary field, and the description of the feature in the Description field.
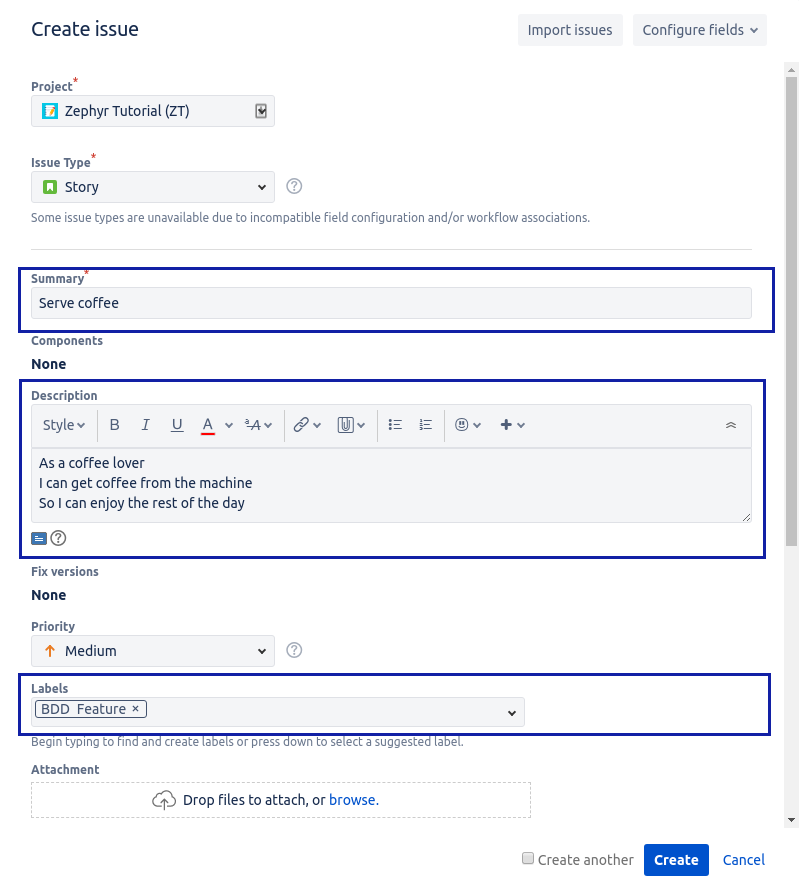
Click on the Create button
You can create many feature issues in the same manner.
Once the feature issues are created, go to the first one. On this page, the Test detail panel allows you to create many scenario issues.
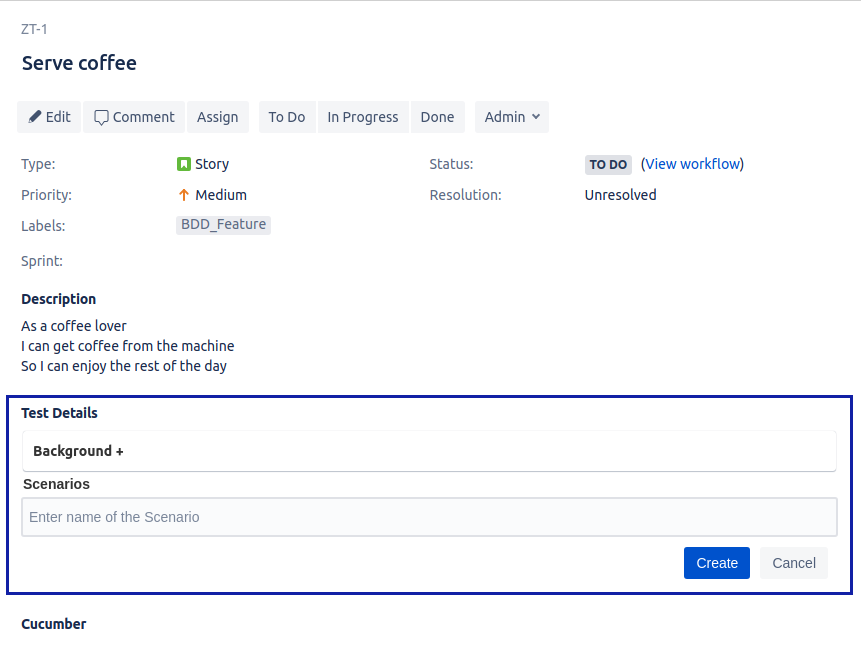
To create a scenario, just put its name in the Enter name of the Scenario field and click on the Create button.
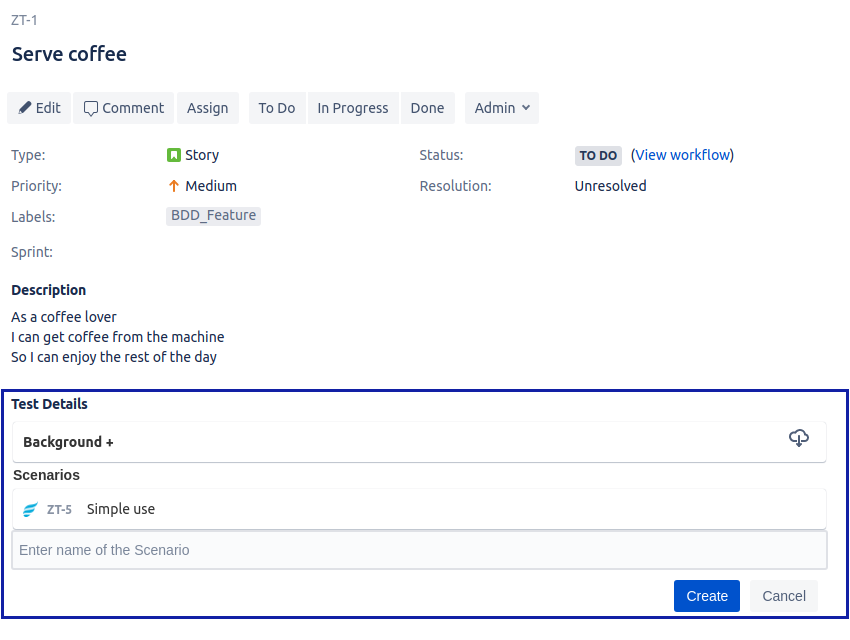
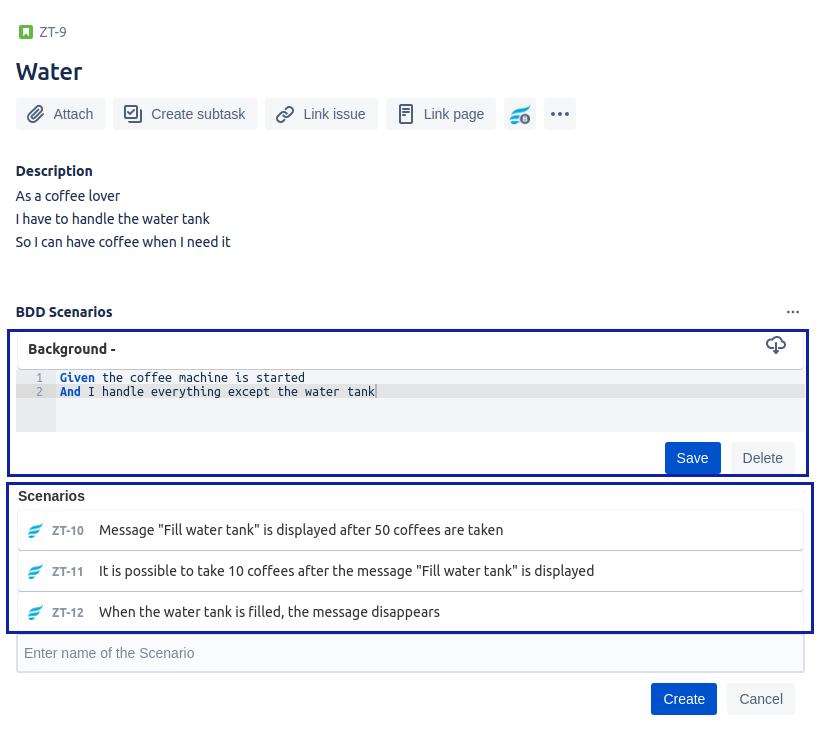
This creates a scenario test issue. You can add here many scenarios or a background.
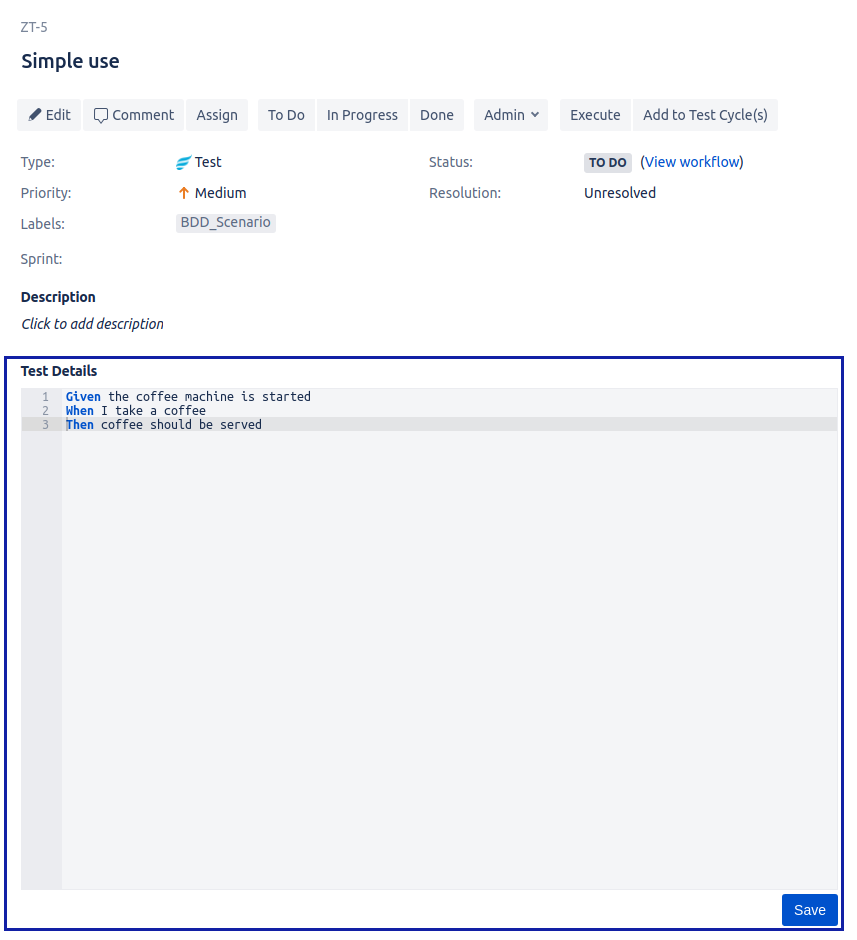
Scenario test page
To go the a scenario test page, just click on its key to navigate to it. The scenario test issue page allows to add the content in Gherkin format in the Test Details panel.
Add your tests in a test cycle
You can use scenario tests like other Zephyr tests. So you can create a test cycle and add them into it.
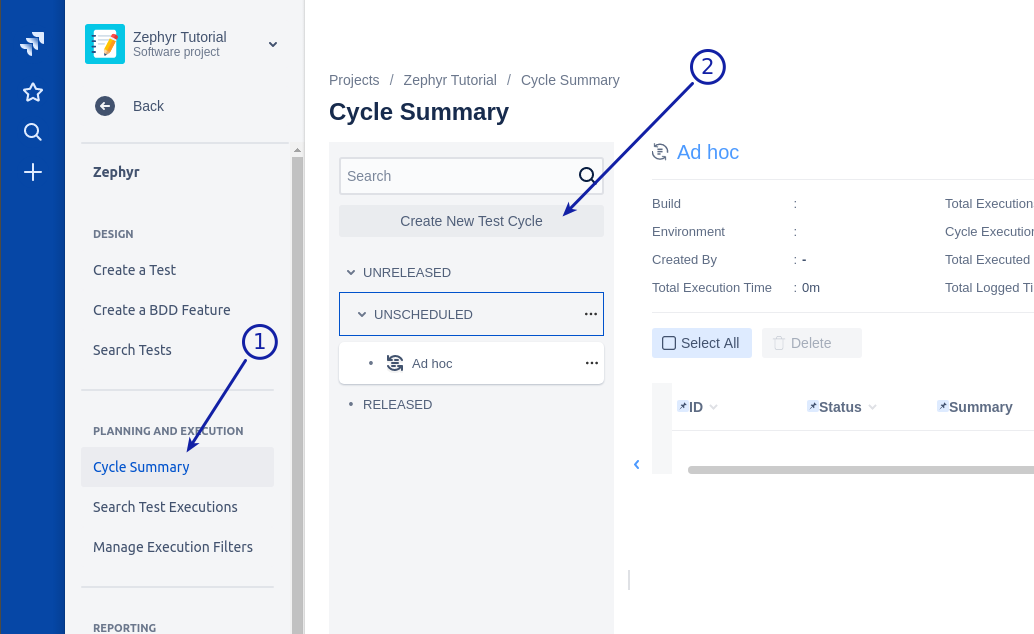
In the project menu, select Zephyr and Cycle Summary and click on the Create New Test Cycle button to create a new test cycle.
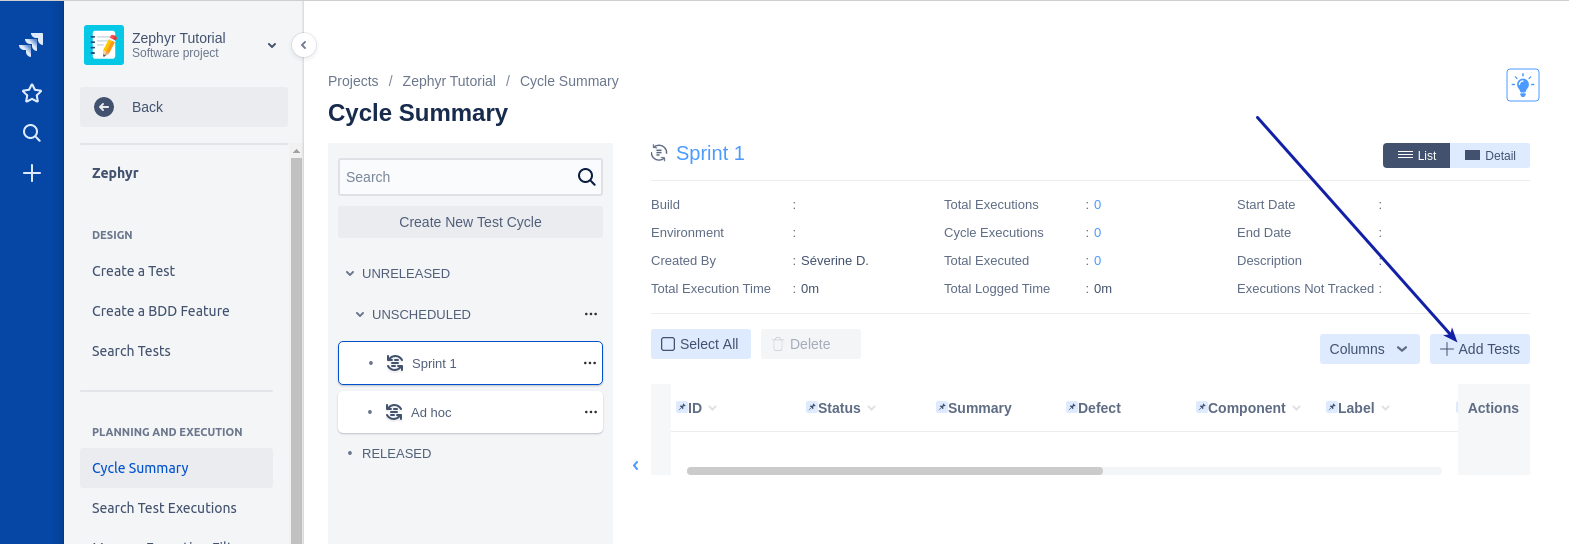
Add the name of the test cycle to create it. In this test cycle, click on the Add Tests button to add your tests in this test cycle.
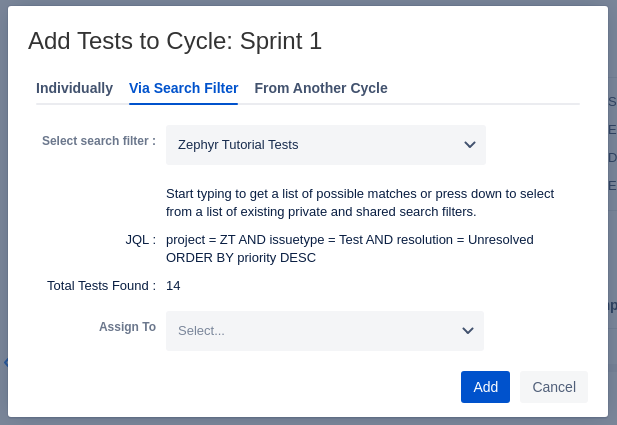
Select the tests you need and validate.
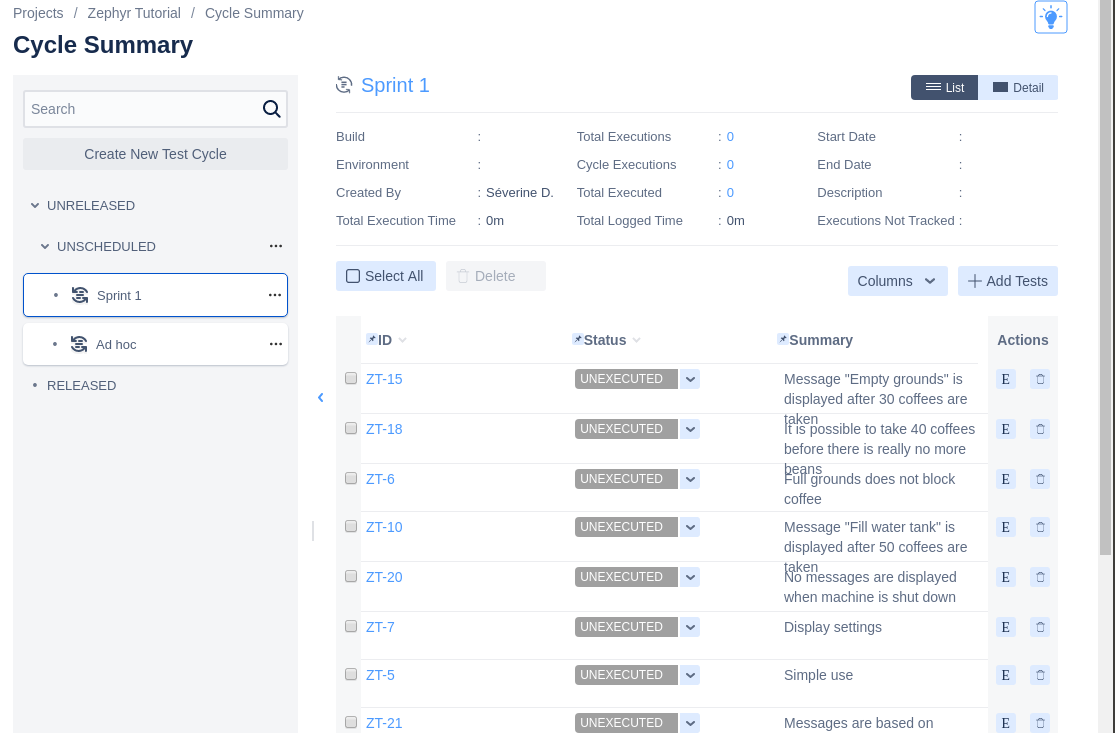
That’s it, your BDD scenarios are added to a test cycle. If you need, yo can update the status of these scenarios directly in this interface:
Push your feature files in a Git repository
To share the features you designed in Jira with the developers of your team, you can download the feature files directly from the test cycle.
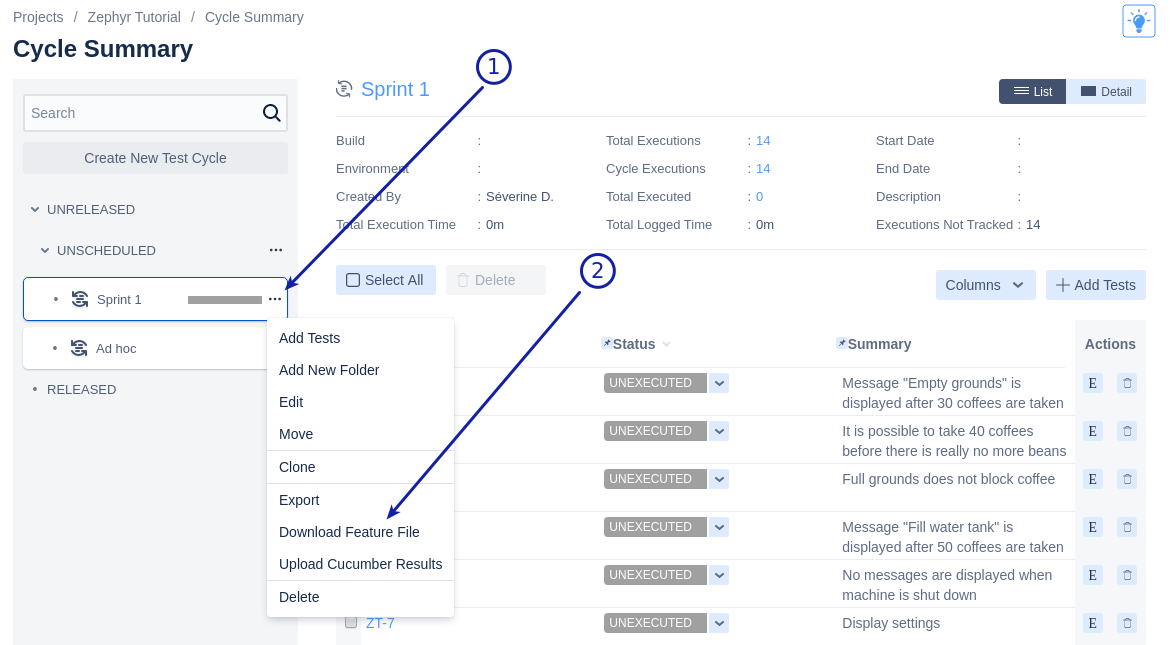
You obtain a zip file containing all the feature files of this test cycle. Unzip this file and add, commit and push the features files in the Cucumber project of your Git repository.
If you don’t have yet a Cucumber project in your repository, begin by creating an empty Cucumber project according to your langage.
Create the living documentation
The living documentation section allows you to synchronize your feature files of the Git repository to watch them directly in Jira.
In your Jira project, back to the Jira project menu and click on the Living Documentation menu.
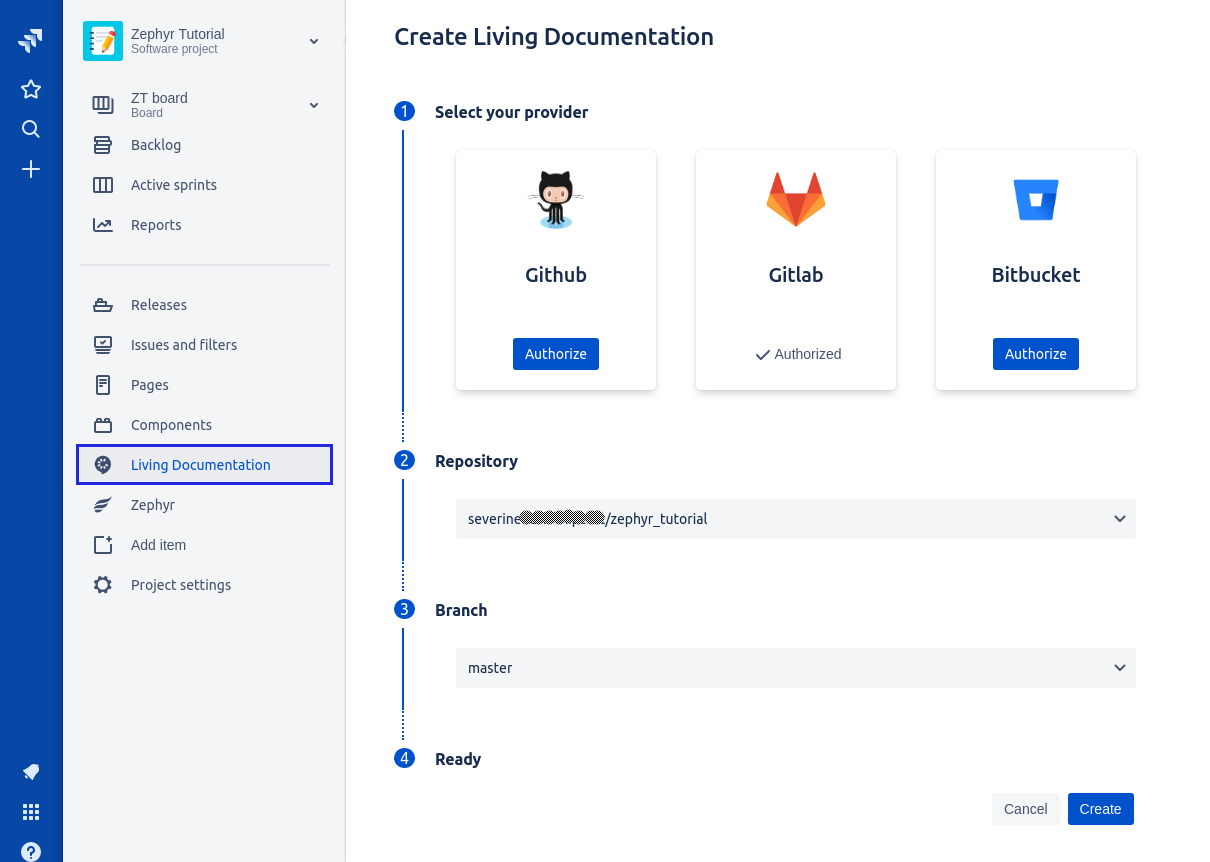
Select your Git provider, your repository, the right branch and create the living documentation.
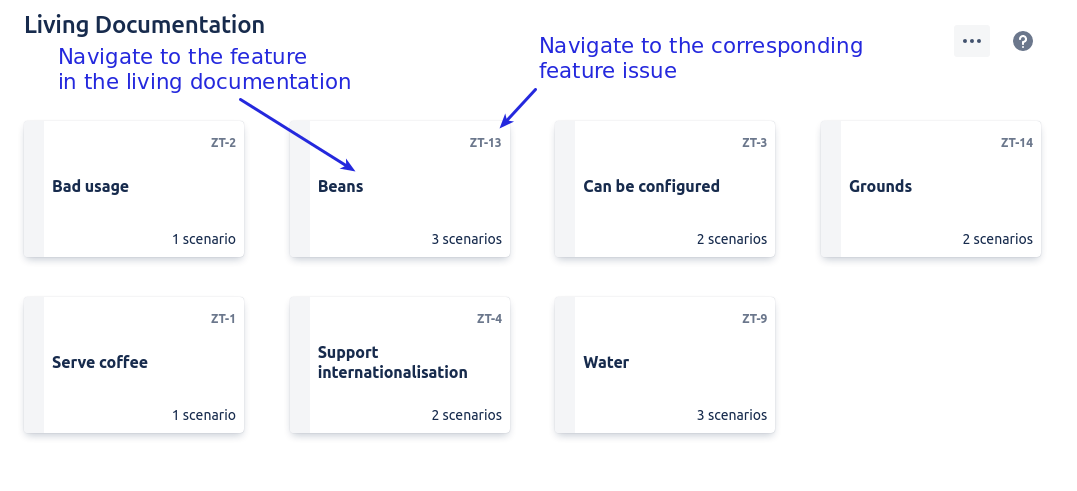
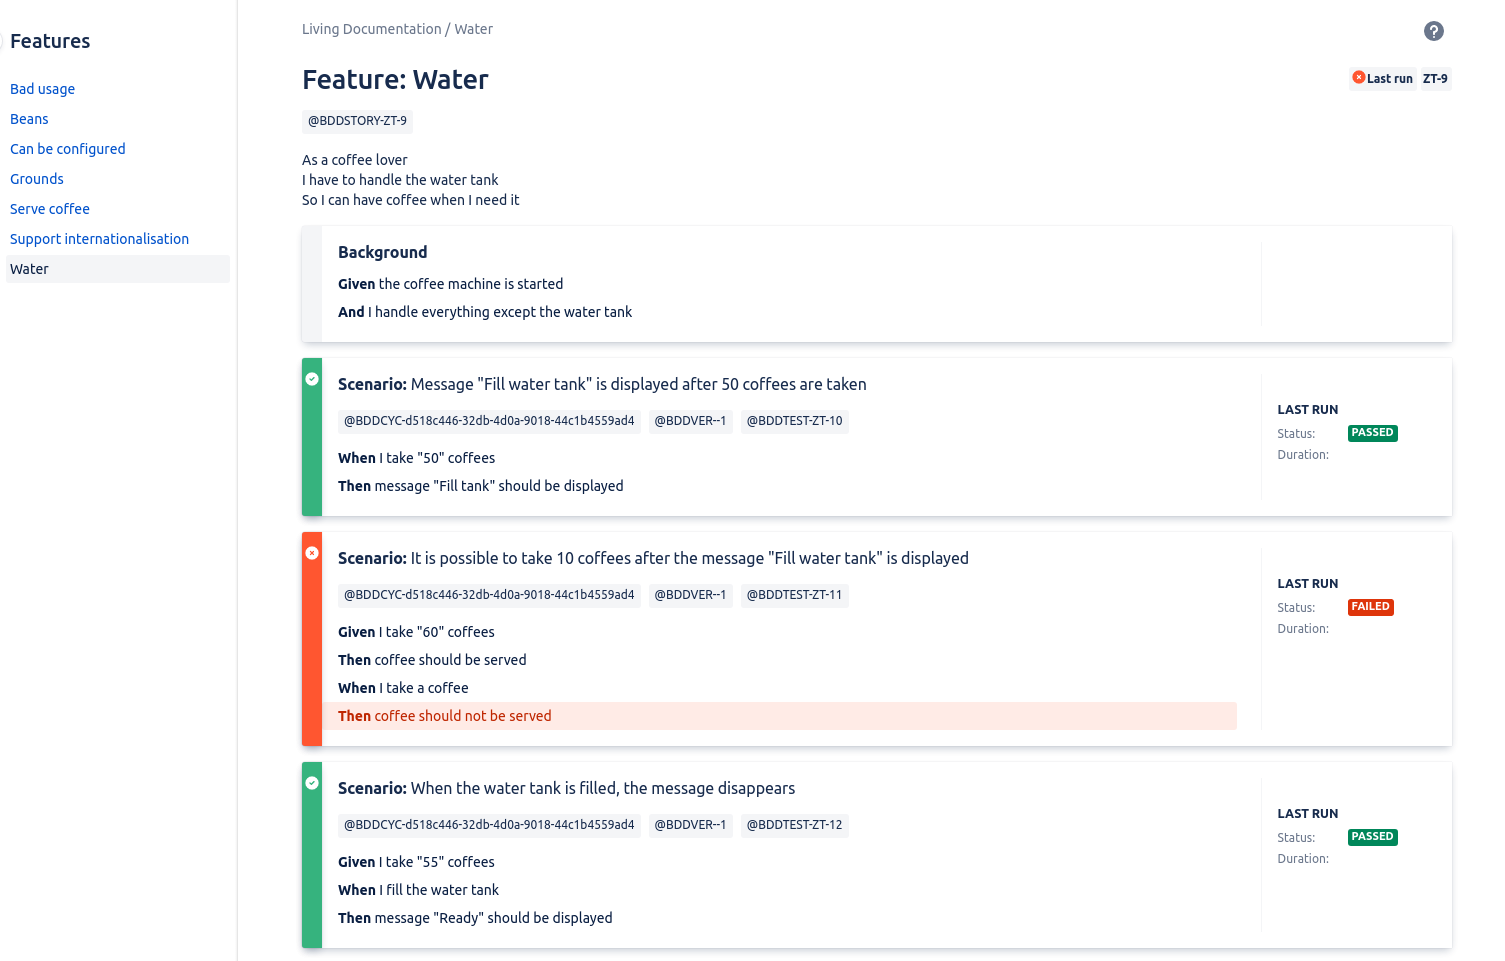
Once the living documentation is created you can navigate to the features of this living documentation. These features are automatically linked to their corresponding feature issue.
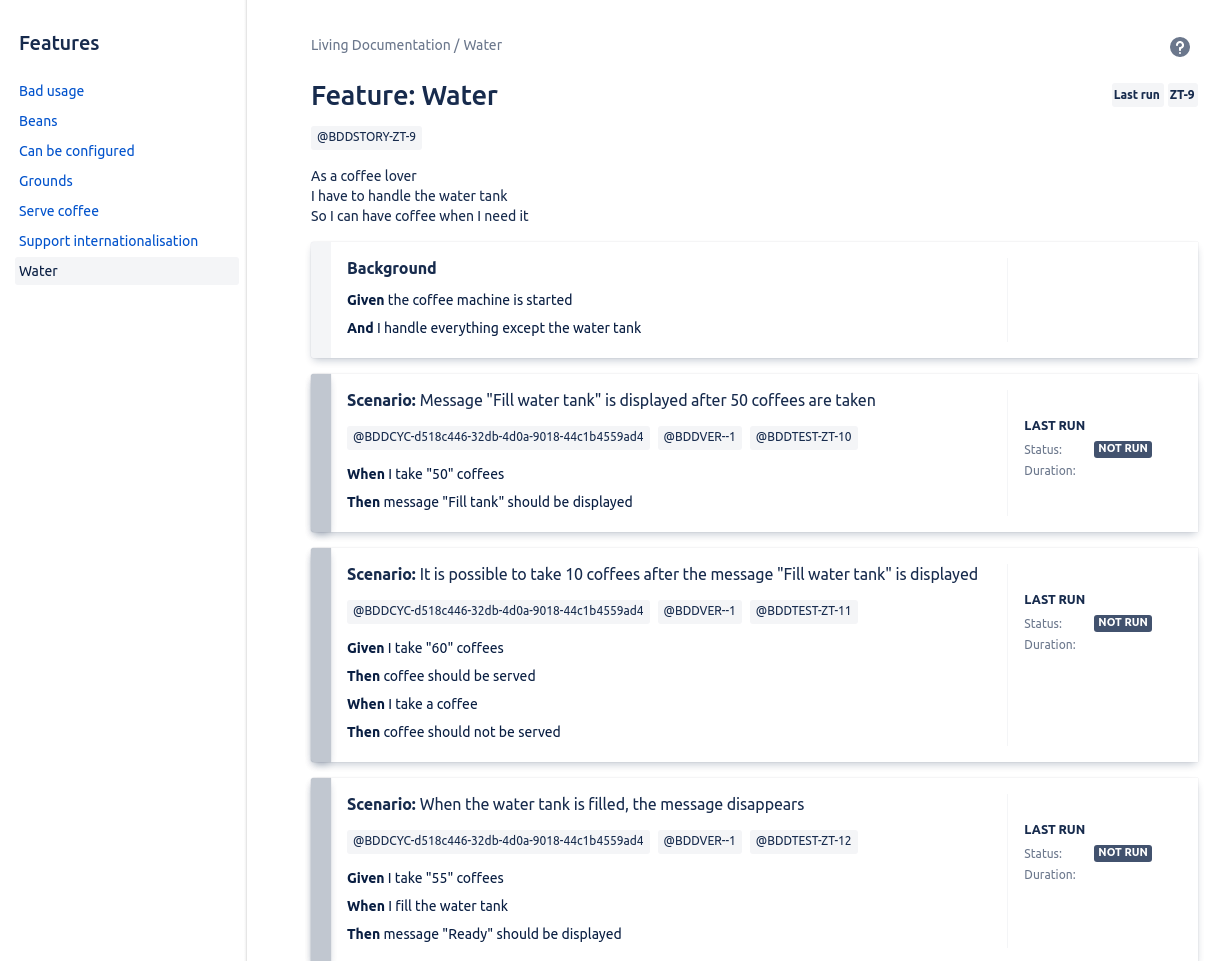
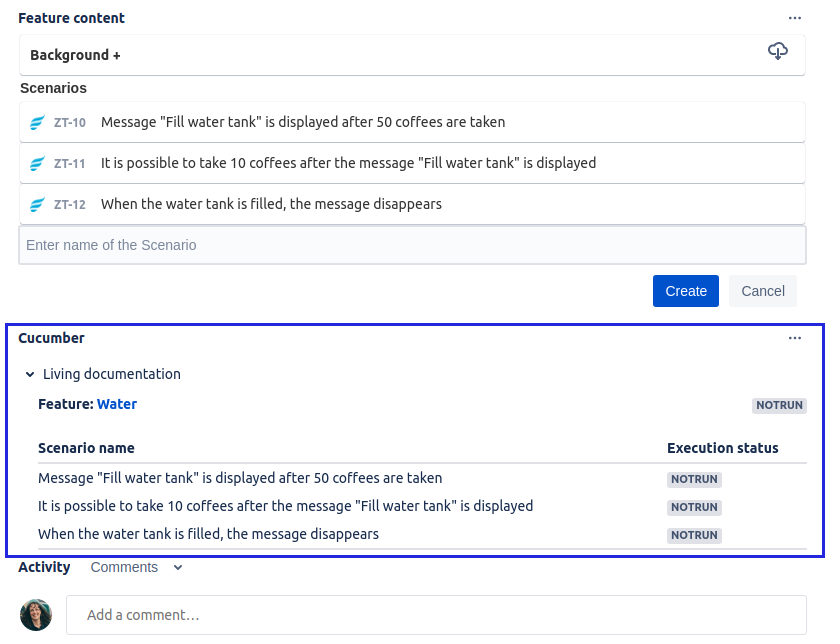
Once a feature issue is linked to a feature in the living documentation, you can see the living documentation data directly from the feature issue in the cucumber panel:
Automate your tests
Use Cucumber open to automate your scenarios. Find out more about automation here: https://cucumber.io/docs/guides/10-minute-tutorial/
Configure your Continuous Integration server
You can configure your continuous integration server so that it can push test results directly into the living documentation. Here are the steps: automate test results push.
Traceability matrix
To see traceability, this is critical because it allows to quickly dive into the traceability of your features through testing and defects. Here I can see Feature1 is being validated by two tests and has multiple failures along with multiple defects. This is a great report because it allows project managers or those involved in the project to quickly see what is the status of the testing activities for this particular feature