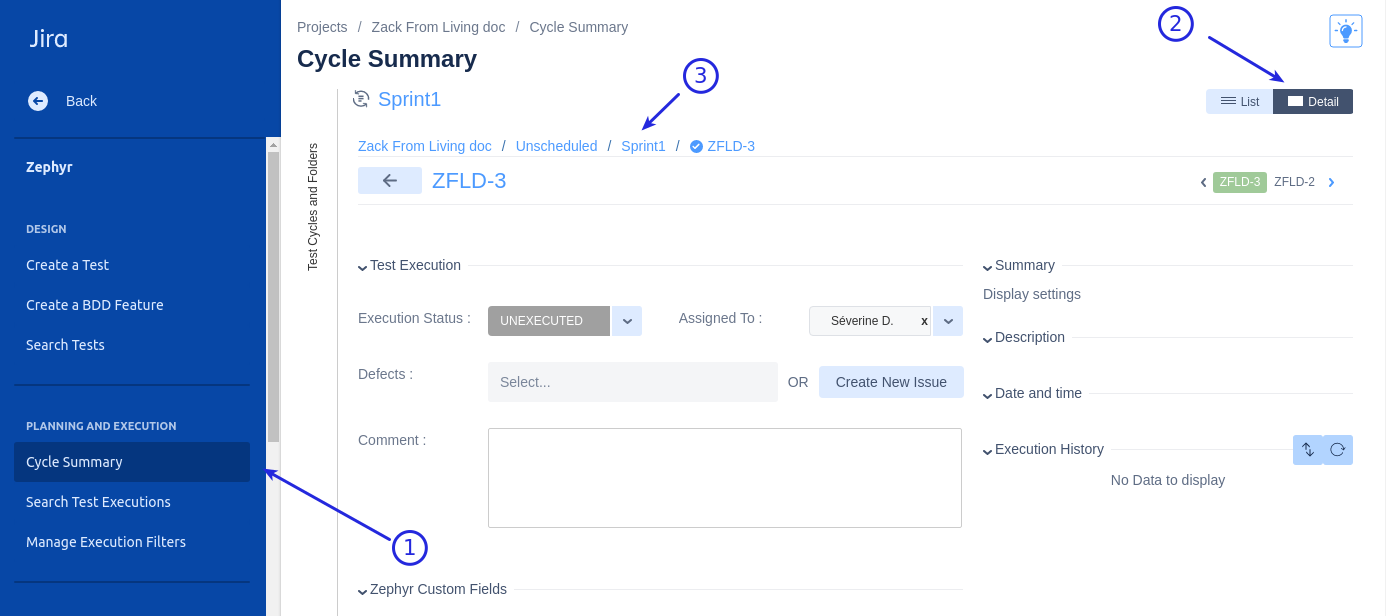
Select the Zephyr menu → Select the Cycle Summary menu → Select your test cycle
Click on the Detail view
In the breadcrumb, select your test cycle

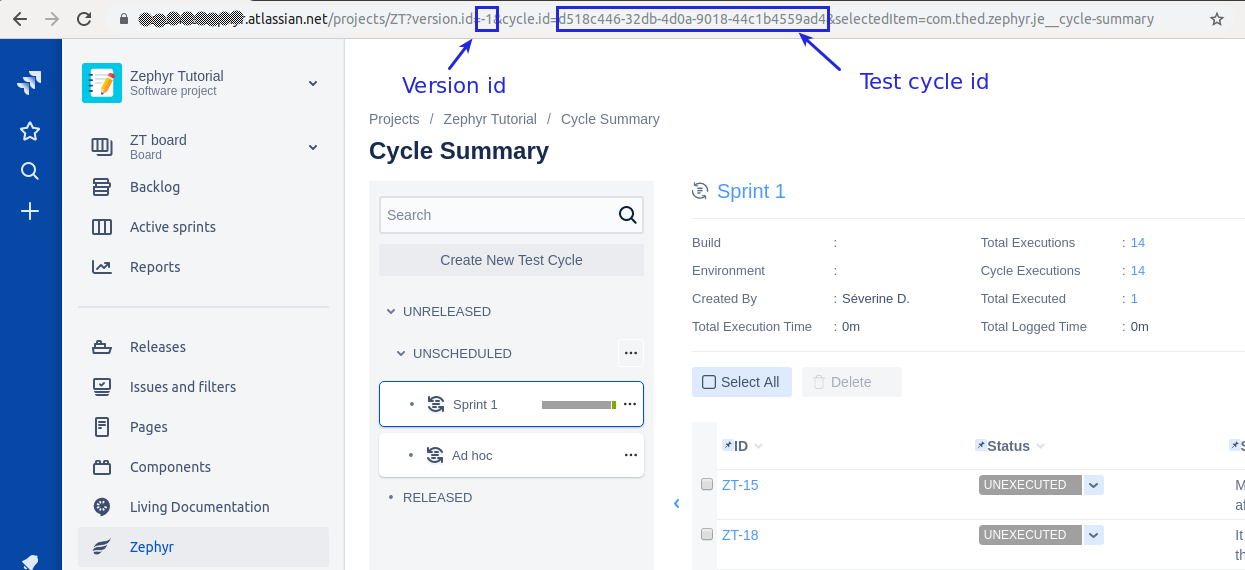
Look at the page URL to find the ids

This article explains how to push a JSON result file into a Zephyr test cycle.
This article assumes that:
|
The Zephyr Cloud REST API allows users to push JSON formatted test results. In this tutorial, we will use curl to execute the request but you are free to use any HTTP client.
POST endpoint
https://prod-api.zephyr4jiracloud.com/connect/public/rest/api/1.0/bdd/results/import
Content-Type: application/json
Authorization: JWT <JWT Token>
zapiAccessKey: <ZAPI Access Key>
projectId: Jira project id
cycleId: test cycle id
versionId: test cycle version id
bddresult: JSON test result file
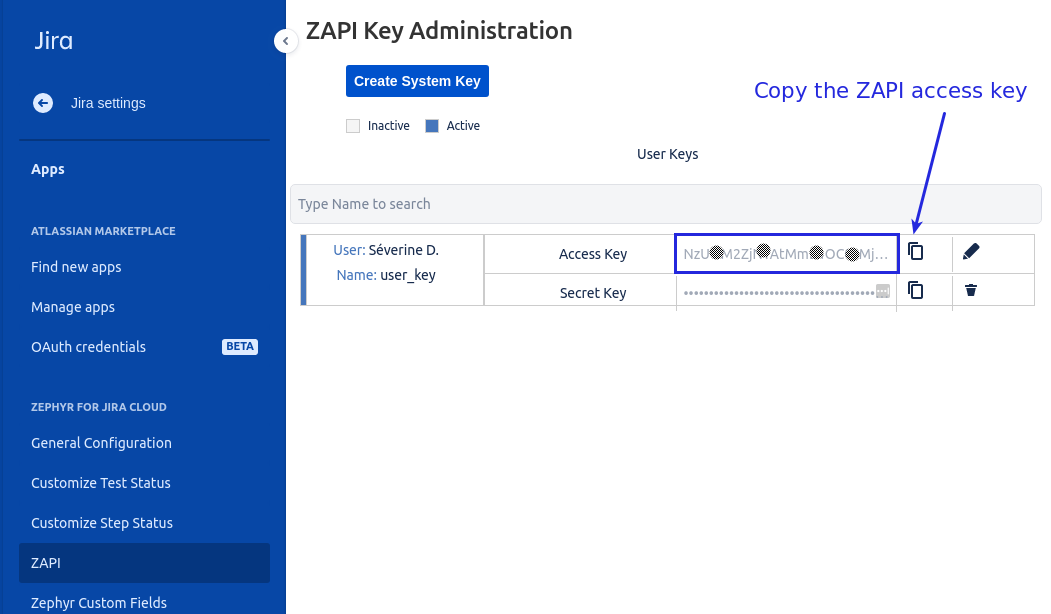
To obtain your ZAPI Keys, the ZAPI app should be installed on your Jira. Install this application on Jira like any other application.
Once ZAPI is installed, go to the ZAPI Key Administration page in Jira settings.

Click on the copy button next to the Access Key and the Secret key to copy them.
More documentation about ZAPI app here.
Zephyr Cloud uses a technology called JWT (JSON Web Token) to authenticate API requests. JSON Web Tokens (JWT) are a standard way of representing security claims.
To generate the JWT token, you need:
ZAPI access key
ZAPI secret key
Atlassian Account Id
You can use this pseudocode to generate a JWT token:
// A function to build Query String Hash // See: https://developer.atlassian.com/cloud/jira/platform/understanding-jwt/#qsh function QSH(url) retrun qsh_of_url // Use a JWT library to encode and sign the claim import JWTEncode from JWT // Declare the ZAPI access key, secret key and the account Id zapi_access_key = your Zapi access key zapi_secret_key = your Zapi secret key account_id = your account id // Declare Zephyr results API URL api_url = https://prod-api.zephyr4jiracloud.com/connect/public/rest/api/1.0/bdd/results/import // Build Query String Hash of the API URL api_url_qsh = QSH(api_url) // Build your JWT claim claim = a hashmap with the following iss: zapi_access_key, iat: NumericDate of now, exp: NumericDate of now + 1 minute, qsh: api_url_qsh, sub: account_id // Encode and sign your claim token = JWTEncode(claim, zapi_secret_key) // Print token or use it to set the Authorization header print token |
More information on how to generate JWT tokens can be found here.
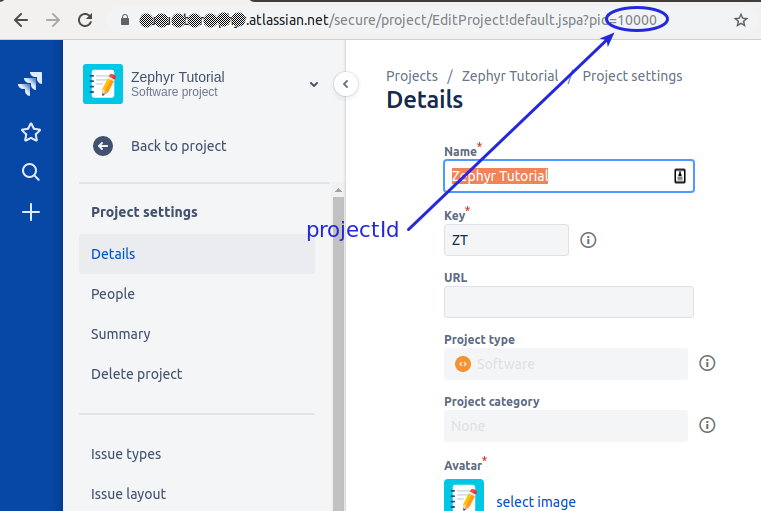
There are many ways to find the Jira project Id. You can, for example, use the Jira API but the easier way is to go into the project setting page and to look at in the page URL.

To obtain the Test Cycle Id and the Version Id:
Select the Zephyr menu → Select the Cycle Summary menu → Select your test cycle
Click on the Detail view
In the breadcrumb, select your test cycle

Look at the page URL to find the ids

Run this Curl command next to the results.json file.
curl -X POST 'https://prod-api.zephyr4jiracloud.com/connect/public/rest/api/1.0/bdd/results/import' \ -H 'Authorization: JWT $jwt_token' \ -H 'ZapiAccessKey: $zapi_access_token' \ -F 'projectId=$project_id' \ -F 'cycleId=$cycle_id' \ -F 'versionId=$version_id' \ -F bddresult=@results.json |
You can now see the test results directly into your test cycle.
|